Ring Sizer for Android: from first measurement to a useful size record
To use Ring Sizer on Android, calibrate the display with the physical reference requested by the app, match the inside opening of a round ring, and repeat the measurement. Keep the original millimetres alongside the size system and finger. Save the estimate with notes, then confirm an important purchase using a physical sizing kit or jeweller.
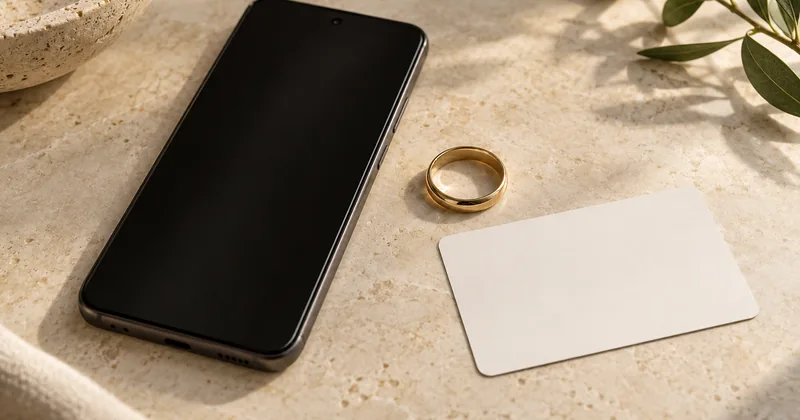
On Android, a ring-sizing app is useful when you have a ring that fits but cannot remember its size, or when a shop uses a different sizing system. The useful result is more than a number: it is a measurement you can trace back to the right ring, finger and method.
This walkthrough is for Ring Sizer by AIPGEN. It covers the Android workflow rather than assuming that every Android phone has the same physical screen scale. Start with calibration, make a careful comparison, then save enough context to recognise the result later. A screen estimate can narrow your options. It cannot reproduce the feel of a wide wedding band on your hand.
If you only need a quick browser check, the on-screen ring sizer is available without installing the app. Choose the app when you want to keep measurements together and return to them while shopping.
What does the Android app actually do?
The Google Play listing describes calibrated existing-ring measurement, paper-strip and photo-assisted tools, and six sizing systems. It also supports notes, favourites, comparing records, sharing size cards and exporting a collection. The free version holds up to three measurements; optional Premium adds unlimited saved measurements. Check Google Play for current availability and local subscription prices.
Optional AI previews are a separate feature. They illustrate a style on a hand photo; they do not establish the size to order or the exact appearance of the finished product. That feature needs internet access and consent to image processing. An attractive preview should never overrule an uncomfortable physical fit.
The screenshots below show actual product screens. They are interface examples, not objects you should measure against: an image embedded in a web article can be scaled to any size.
Official Google Play screenshots, captured in English on Android. These images are not a calibrated measuring surface. App versions and reference charts may round size labels differently; keep your raw millimetre measurement and check the seller’s chart.
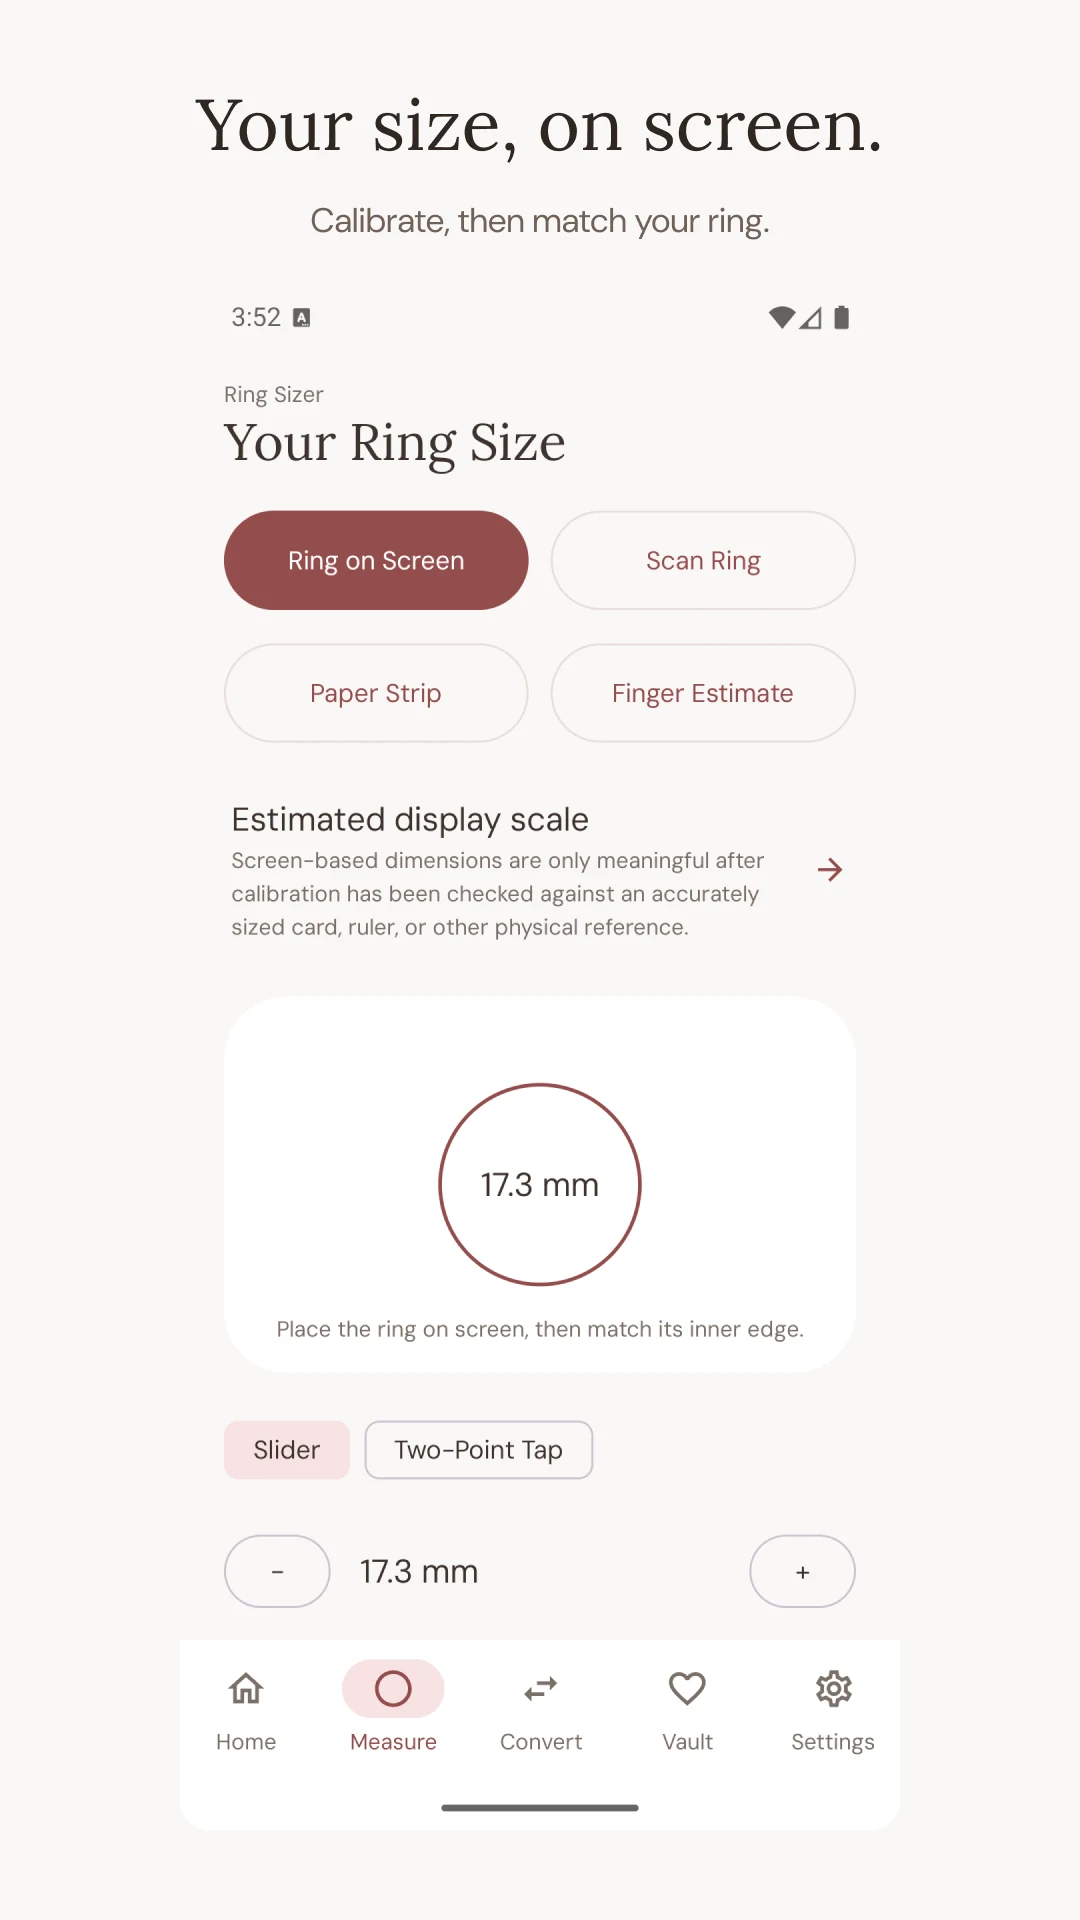
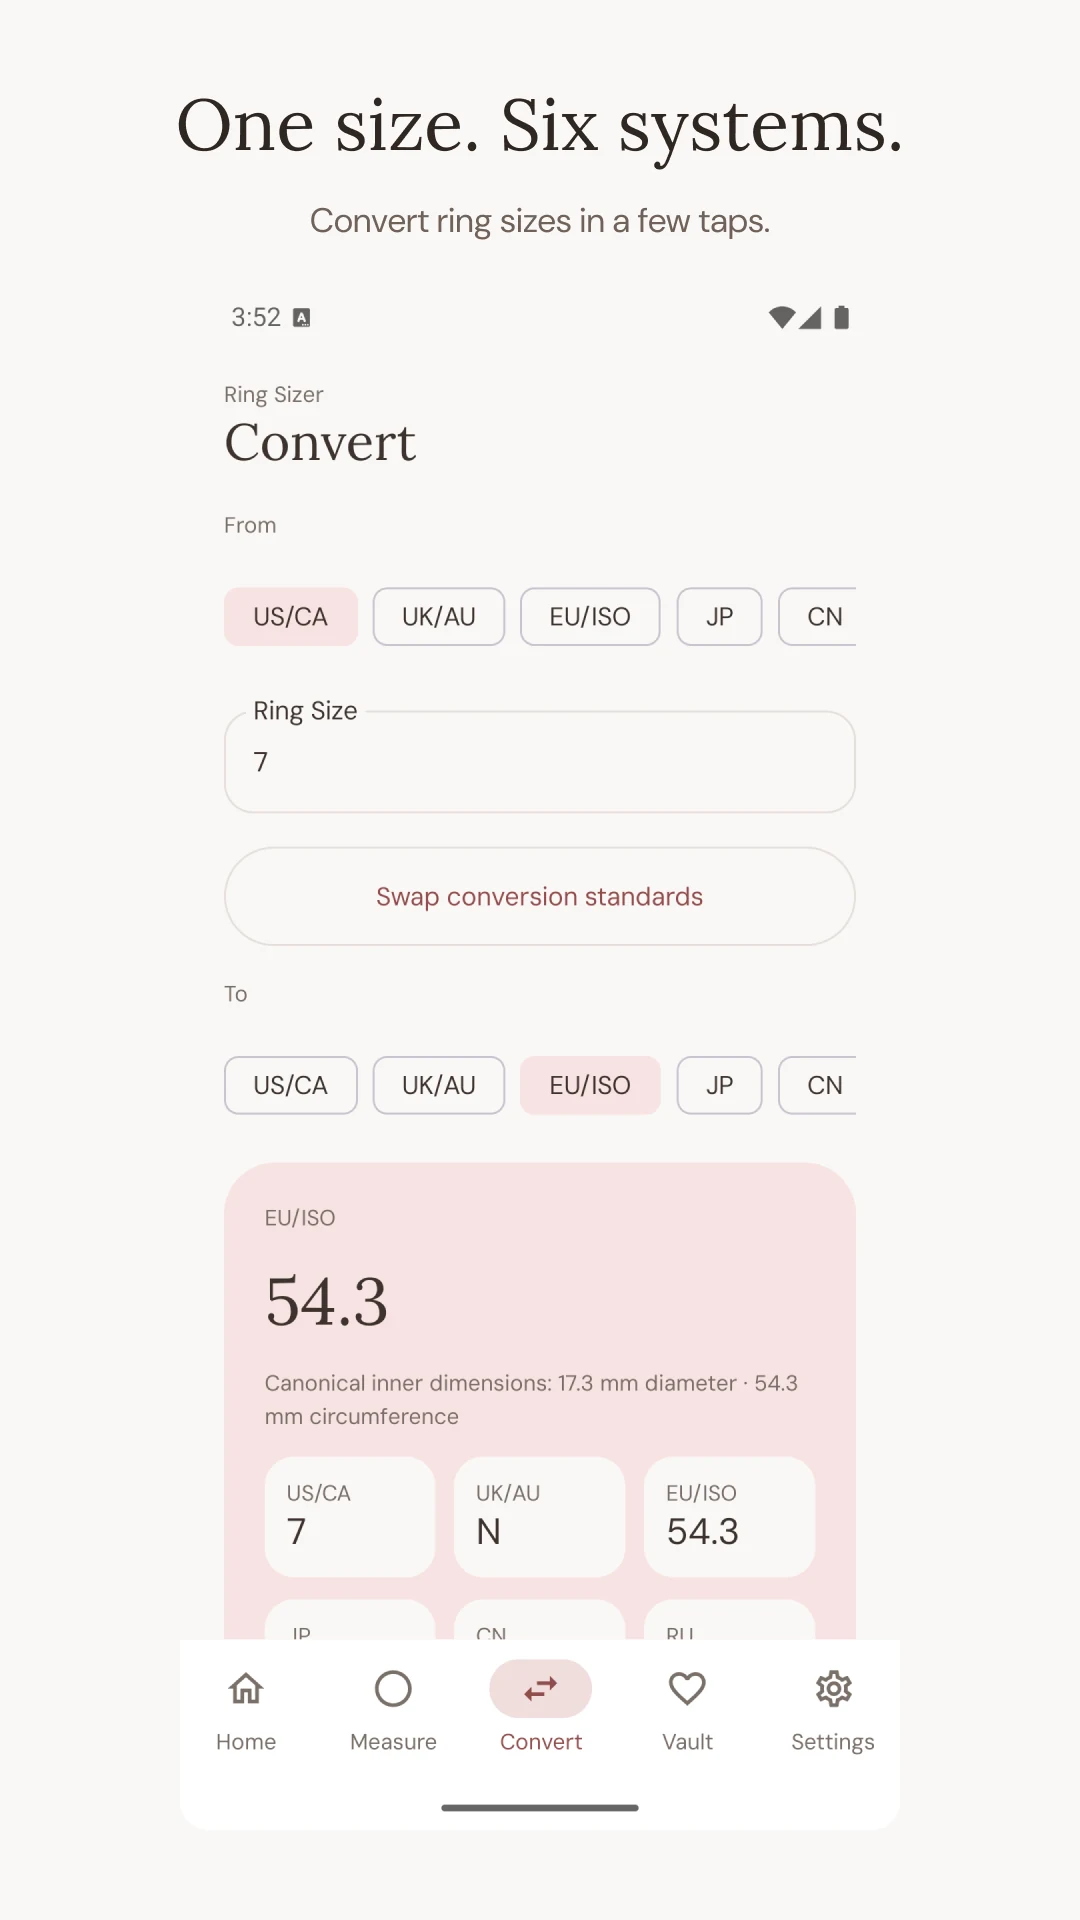
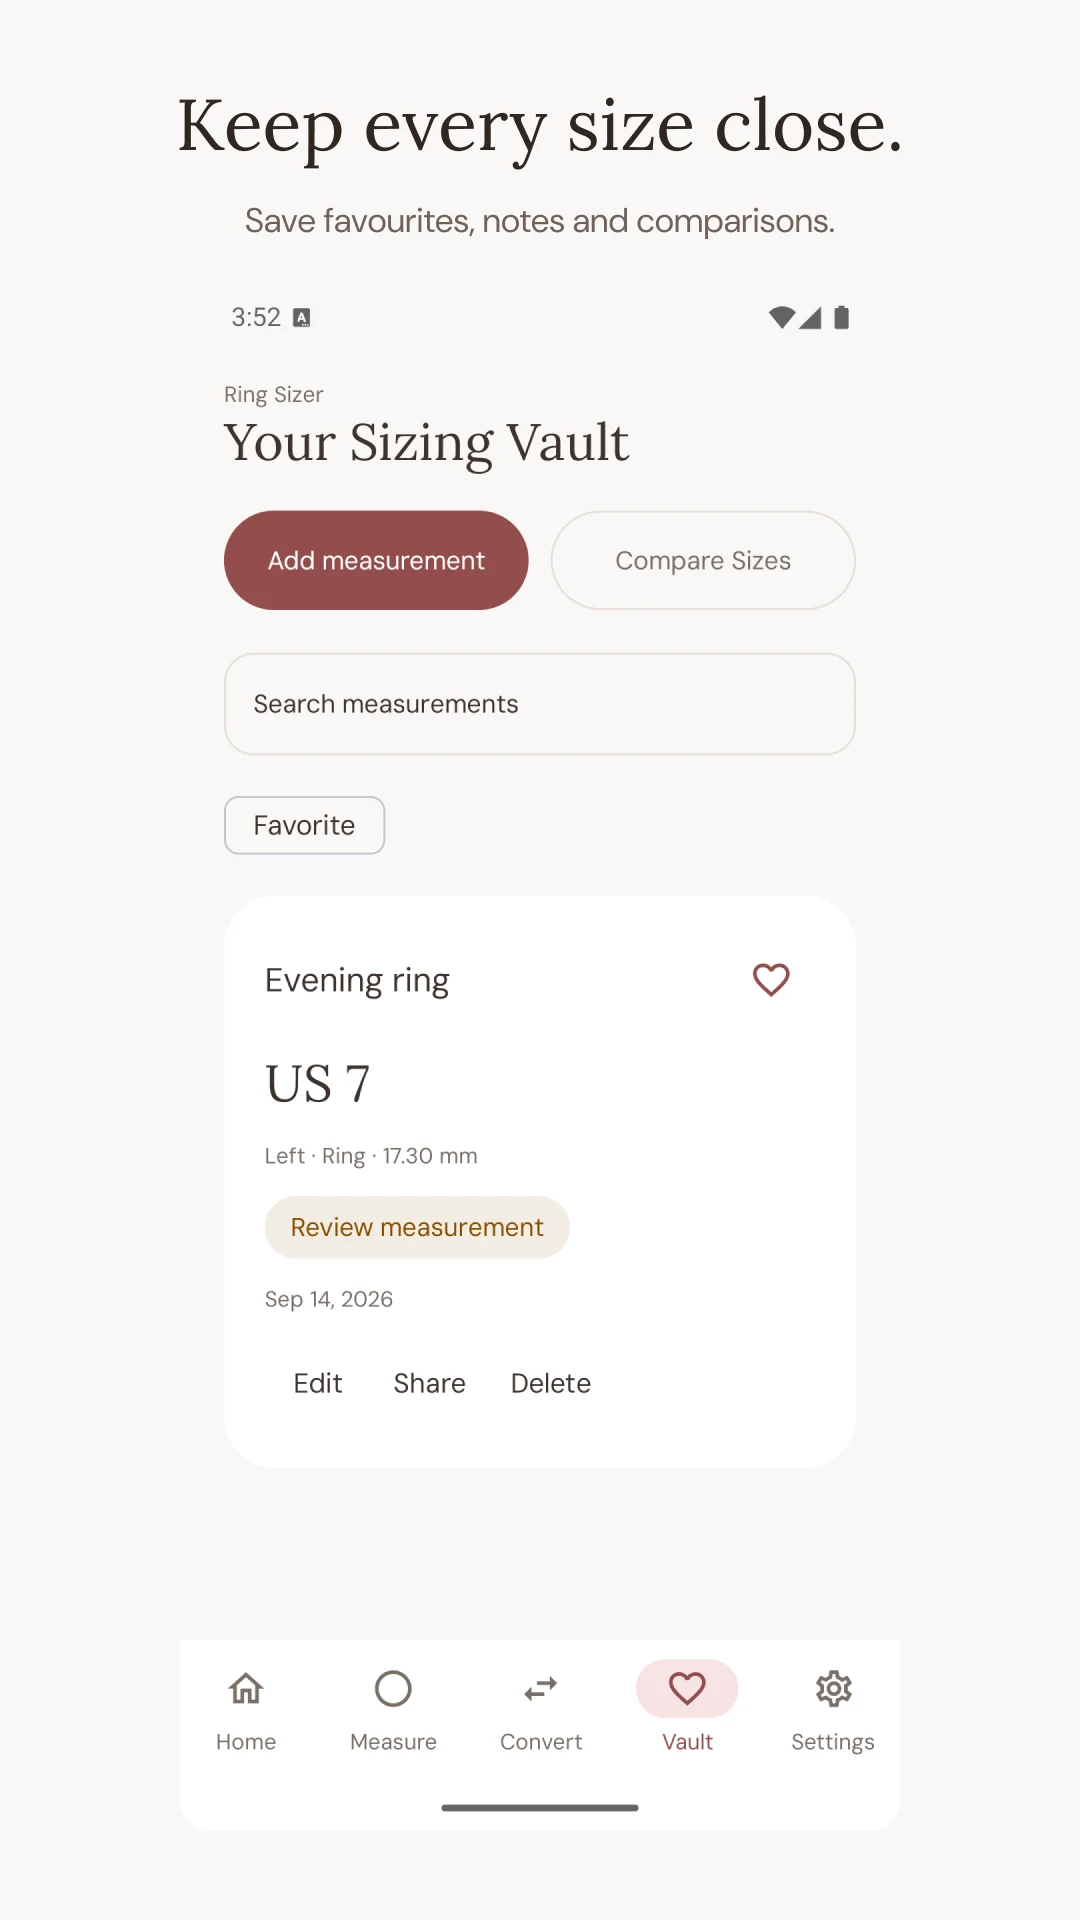
In the English Android screenshots, the measurement option is called “Ring on Screen.” Notice the “Estimated display scale” warning above the circle: a displayed 17.3 mm is not a checked physical measurement until you verify calibration. The “Convert” screen lets you name the source and destination systems. “Vault” shows a saved record with its hand, finger and millimetres, plus Edit, Share and Delete actions.
These screenshots also show why you should retain millimetres. Their conversion example associates US 7 with 54.3 mm and UK N; this website’s reference table uses nearby nominal equivalents. Do not assume every table or app version uses identical rounding and label mappings. For an order, provide the physical measurement and confirm the retailer’s chart.
What should you have beside your phone?
For the existing-ring method, choose a round ring that already fits the intended finger and hand. Have the physical calibration reference requested by the app ready, and work on a clear, level surface with good light. A soft cloth nearby gives you somewhere safe to put the ring between attempts. Clean the ring and screen first so you are not sliding grit across the glass.
Check whether the ring can rest level. A raised stone setting, projecting decoration or an uneven band can hold it at an angle. Do not press a setting into the display to make it lie flat. Use another method if the opening cannot be viewed straight on.
Identify which finger the reference ring fits. A ring worn on the right middle finger is evidence about that finger, not an automatic measurement for the left ring finger. Label it before starting.
Calibrate before trusting the displayed millimetres
Calibration links a distance drawn on the screen with a physical distance in the real world. Follow the app’s calibration instructions and use the specified reference rather than a similar object chosen by eye. Align the requested edges carefully and view them from directly above. A tilted view can make two edges appear aligned when they are not.
After accepting the calibration, check the reference again. If the match has drifted, stop there and correct it before measuring jewellery. Recheck when using a different phone or after a change that could affect how the measurement view is displayed. A saved result from a previous phone does not validate the scale on this one.
Here is why this matters. In an illustrative calculation, a 2% scale error on a 17.0 mm opening is 0.34 mm. Multiplying that diameter difference by pi gives roughly 1.07 mm of circumference error. That is enough to matter when comparing nearby size choices. Extra decimal places cannot repair a poor calibration. The screen calibration guide explains the distinction between a sharp-looking display and a correctly scaled measurement.
How do you match an existing ring on screen?
Rest the ring gently over the measuring shape and look straight down through its opening. Adjust the comparison to the inside edge, not the outside edge of the metal. The hole is the part that must fit a finger; including the wall of the ring makes the estimate too large.
Lift the ring completely, put it back, and repeat the match. This second placement is valuable because a result that only works in one exact position may depend on angle or alignment. Rotate the ring for another look. If one direction gives a noticeably different opening, do not average the numbers into a confident size. The ring may be distorted, or the viewing angle may be wrong.
GIA’s ring-measurement guidance notes that an inside measurement converted through a chart requires a round ring. Ask a jeweller to inspect an oval or damaged example. The existing-ring guide has more detail on the shapes and settings that make screen comparison difficult.
A worked example: 17.0 mm is a measurement, not a universal size
Imagine that repeated placements of a plain, round ring give an inside diameter close to 17.0 mm. The corresponding circular circumference is 17.0 × pi, or approximately 53.4 mm. Both numbers describe the same opening. They should be labelled so that a shop does not read 17.0 as a regional size code or mistake 53.4 for a diameter.
Use the ring-size converter to compare the physical measurement with the systems shown by a retailer. Keep the original value even if the chart places it near a familiar label such as US 6.5. A nominal chart row is a reference, not proof that every ring bearing that label has precisely the same measured opening or will feel identical.
A sensible saved note for this example would be: “Left ring finger; narrow round band; screen estimate about 17.0 mm inside diameter; repeated three times; comfortable existing fit.” It is a worked example, not a test result for your hand. Replace every detail with what you actually used.
What if you have no ring to measure?
Switch to a method that measures the intended finger. For a paper-strip approach, use a flat strip that does not stretch, mark where it overlaps, and identify exactly what length the instructions ask you to enter. Check whether the resulting loop can also pass the knuckle. Pulling paper tight into the skin may produce a small, repeatable number that would be uncomfortable in a rigid ring.
If you use photo-assisted measurement, follow the reference and image-quality instructions for that tool. Perspective, a curled strip and an unclear overlap can all undermine the input. A picture without known scale cannot reveal an absolute size just because it looks detailed.
The finger-measurement guide explains the base and knuckle checks. For an expensive or non-resizable ring, obtain a physical sample in the intended width before ordering. App and paper methods are helpful preparation for that fitting.
How should you save a result you will understand later?
Use the notes field to record context while it is fresh. Include the hand and finger, the measurement method, the original units, and whether the result came from a ring or a finger. Add the ring width if you know it. “My size” is easy to enter and difficult to interpret six months later, particularly if you buy jewellery for other people.
Keep estimates separate from confirmed fitting results. For example, label a screen record “home estimate” and a later shop result “physical gauge, 6 mm band.” If they disagree, preserve both until you understand why. Quietly replacing the older entry hides the information that might explain the difference.
Before sharing a size card or exporting records, review any personal notes and photographs you included. Send only what the recipient needs. A jeweller usually benefits from the intended finger, width, system and method; they do not need unrelated personal details.
Troubleshooting results that do not agree
Start with the original measurement, not the converted label. Two charts may round a physical value differently, so a nearby size label is not necessarily evidence that your screen reading changed. If the millimetres differ too, work through the setup in order.
| What you notice | What to check next |
|---|---|
| A ring measures differently after you lift it | Repeat calibration, flatten the view and align the inner edge |
| One direction looks wider than another | Check for tilt or an out-of-round ring; do not force a circular answer |
| The converted number looks implausible | Confirm diameter versus circumference and name both sizing systems |
| A new wide band feels tighter than the reference ring | Test a width-matched physical sample |
| A hand photo gives a neat result but the reference is unclear | Retake it according to the tool’s instructions or use another method |
When repeated attempts still conflict, save the uncertainty rather than selecting the answer you prefer. A note saying “17.0–17.4 mm; cannot align reliably” is more useful than a false 17.2 mm confirmation. The measurement-method comparison can help you choose a more appropriate tool.
What can this app not confirm before checkout?
It cannot tell you how a particular band will feel over your knuckle, guarantee the seller’s manufacturing tolerances, or establish a smart-ring manufacturer’s proprietary size. Do not use a standard jewellery conversion as an Oura order size. Smart rings need the correct model’s fitting kit; see the smart-ring sizing guide.
Likewise, a narrow ring that fits well does not settle the size of a broad band. The extra width, inside profile and way a ring is weighted all affect the wearing decision. Check the shop’s exchange rules before engraving or custom work. Your saved measurement should help you ask a better question, not discourage you from trying a real sample.
For ordinary jewellery, the next step is straightforward: calibrate, measure, repeat, and save the original value with context. Then take that record to the seller or fitting appointment.