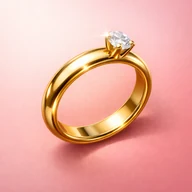
How to measure your ring size at home
To measure your ring size at home, measure the inside diameter of a ring that already fits and match it to a size chart. 17.3 mm is a US 7. If you have no ring, measure the finger’s circumference instead. Both are far more accurate when the tool is calibrated to your screen or printer first.
There is no single right way to measure a ring size. There are five common ways, and they are not equally good. This guide ranks them honestly, explains the one step almost everybody skips, and shows you how to end up with a number you can confidently order against.
Which method is most accurate?
| Method | Typical error | Needs | Best for |
|---|---|---|---|
| Jeweller’s steel mandrel and gauge set | ±0 sizes | A visit | The reference standard |
| Calibrated app measuring an existing ring | ±¼ size | A ring you own | Ordering online today |
| Calibrated app measuring a finger | ±½ size | Nothing | No ring available |
| Printed paper sizer | ±½ to 1 size | A printer, checked scale | A one-off |
| String or paper strip | ±1 to 2 sizes | Nothing | A rough starting point |
The gap between the top and bottom of that table is a full ring size or more. On a plain band a full size is the difference between comfortable and spinning off in cold weather. On a set engagement ring it is the difference between wearing it and paying for a resize.
Notice what separates the top half from the bottom. Everything above the line measures a rigid object against a verified scale. Everything below measures something flexible against a scale nobody checked.
Should you measure a ring or a finger?
Measure a ring you already own if you possibly can. It is more reliable for one simple reason: a ring is a rigid object with a fixed diameter. It does not swell in the heat, shrink after a swim, or read differently at breakfast and bedtime.
Measure a finger only when there is no ring to work from, or when you want to cross-check a ring measurement against the hand it is meant for. Fingers are moving targets, which is exactly why that method carries twice the error of the one above it.
Ring sizes are a property of a finger, not of a person. The same finger can measure differently on the left and right hands, and neighbouring fingers have no dependable conversion between them. Measure the exact finger and hand the ring is for; another finger is only a rough clue, not a number you can correct with a standard addition or subtraction.
Why does calibration matter so much?
This is the step almost every guide leaves out, and it decides whether anything else you do is worth the effort.
Every at-home method works by comparing your ring or your finger against a scale: a printed circle, an on-screen circle, the markings on a ruler. If that scale is even slightly wrong, then every measurement made against it is wrong by the same proportion. You will never notice, because the number it produces still looks entirely plausible.
Printed sizers go wrong whenever the printer applies “fit to page” or a PDF viewer quietly shrinks an oversized page. Even a small scale error can move the result across a seller’s size boundary, and nothing on the paper announces that it has happened.
On-screen sizers go wrong whenever the app assumes a generic pixel density instead of reading your actual device. A 6.1-inch iPhone and a 6.9-inch iPhone do not draw a 17 mm circle with the same number of pixels, and an app that hard-codes one figure is correct on exactly one model.
Ring Sizer identifies your device and sets its scale from that model’s published pixels-per-inch value, 460 PPI on an iPhone 15 Pro Max for instance, before it draws anything at all. You will see an Auto-Calibrated badge naming the device it used. If you want to verify it yourself, the fine-tune screen lets you hold a coin or a credit card against the display and nudge the scale until they match.
How do you measure a ring you already own?
Place the ring flat on the screen and adjust the circle until it sits exactly inside the band’s inner edge. You are measuring the hole, not the metal, and that distinction accounts for more wrong answers than anything else on this page.
Use two-point tap mode if you want more precision than a slider gives you. Tap opposite inner edges directly and the app takes the distance between them, which removes the small amount of guesswork involved in nudging a circle until it looks right.
Read off the inner diameter in millimetres. That single number is what every size chart in the world is built from, and it is the number to send a jeweller if you are ordering from a market whose sizing you do not recognise.
How do you measure a finger?
Use the on-screen finger gauge and slide it until it sits snugly at the base of the finger. Snug means firm enough that it will not fall off and loose enough that it clears the knuckle without a fight, which is a narrower window than it sounds.
Take at least three readings under ordinary conditions and keep the range. If they cluster closely, use that cluster as the chart baseline. If they do not, check the calibration and repeat on another day before choosing a size. A high reading caused by temporary swelling can be just as misleading as a low reading taken with cold hands, so neither the largest value nor the average is an automatic ordering rule.
If your knuckle is noticeably wider than the base of your finger, measure both points separately. The ring must pass the knuckle and remain stable at the base, but the right compromise also depends on band width, interior profile and whether the design can accept a sizing aid. Try adjacent sizes in a sample that matches the intended ring instead of applying a fixed correction to the gap.
When should you take the measurement?
Finger size is not constant, but there is no universal time-of-day correction or rule that the largest reading is the right one. Measure indoors when your hands feel comfortable and your routine is ordinary. Avoid taking the decisive reading immediately after cold or heat exposure, strenuous exercise, a long journey or anything else that has left your hands noticeably different from usual.
Repeat the measurement on another ordinary day and, if practical, at another routine time. Keep the values as a personal range with notes about the conditions. A repeatable cluster is more useful than one extreme reading. If the range spans adjacent sizes, take it to the finished-ring decision: test those candidates in the intended width and interior profile, or ask the maker which matching gauge they use. The clock cannot choose a size for you.
How do you convert the measurement?
Once you have a diameter in millimetres, convert it to whichever system the seller uses.
National sizes use the nearest chart row. A measured diameter and circumference are converted directly; check the seller’s chart and try adjacent sizes before ordering.
Convert once, straight from your original measurement. Converting twice, from US to UK and then UK to European, rounds twice and can land you a half size away from where you started without a single obvious mistake having been made.
What should you check before ordering?
Run your number past two sanity checks before spending anything.
First, does it match the population? The average women’s ring size is a US 6 to 7 and the average men’s is a US 9 to 10. Sizes outside those ranges are entirely normal, but if your result is a US 4 or a US 13 it is worth measuring again before you order, because it is more likely to be an error than an outlier.
Second, does the finished ring match the reference you measured? A wider band or a different interior profile can change how the same nominal size feels, but neither supplies a universal addition or subtraction. Try a gauge or sample with the intended width and profile, and test a stack as a complete set when several rings will be worn together. The wide band sizing guide explains the matched-width test and the questions to ask the maker before ordering.
The full conversion table
| US / CA | UK / AU | EU / ISO | Japan | China | Russia | Diameter |
|---|---|---|---|---|---|---|
| 3 | F | 44.0 | 4 | 4 | 14 | 14.0 |
| 3.5 | G½ | 45.5 | 5 | 5 | 14.5 | 14.5 |
| 4 | H | 46.8 | 7 | 7 | 15 | 14.9 |
| 4.5 | I½ | 48.0 | 8 | 8 | 15.5 | 15.3 |
| 5 | J½ | 49.3 | 9 | 9 | 15.5 | 15.7 |
| 5.5 | K½ | 50.6 | 10 | 10 | 16 | 16.1 |
| 6 | L½ | 51.9 | 12 | 12 | 16.5 | 16.5 |
| 6.5 | M½ | 53.1 | 13 | 13 | 17 | 16.9 |
| 7 | N½ | 54.4 | 14 | 14 | 17.5 | 17.3 |
| 7.5 | O½ | 55.7 | 15 | 15 | 17.5 | 17.7 |
| 8 | P½ | 57.0 | 16 | 16 | 18 | 18.1 |
| 8.5 | Q½ | 58.3 | 17 | 17 | 18.5 | 18.6 |
| 9 | R½ | 59.5 | 18 | 18 | 19 | 18.9 |
| 9.5 | S½ | 60.8 | 19 | 19 | 19.5 | 19.4 |
| 10 | T½ | 62.1 | 20 | 20 | 20 | 19.8 |
| 10.5 | U½ | 63.4 | 22 | 22 | 20 | 20.2 |
| 11 | V½ | 64.6 | 23 | 23 | 20.5 | 20.6 |
| 11.5 | W½ | 65.9 | 24 | 24 | 21 | 21.0 |
| 12 | Y | 67.2 | 25 | 25 | 21.5 | 21.4 |
| 12.5 | Z | 68.5 | 26 | 26 | 22 | 21.8 |
| 13 | Z+1 | 69.7 | 27 | 27 | 22 | 22.2 |
What are the most common mistakes?
Six errors account for most badly fitting rings, and every one of them produces a number that looks reasonable at the time.
- Measuring the outside of the ring. Ring sizes are inner measurements. A 3 mm band makes the outside diameter 6 mm larger than the size you actually want.
- Measuring a cold finger. The single most common cause of rings that arrive too small.
- Trusting a printed chart you never scale-checked. Print it, then hold a credit card against the printed rectangle. If it does not match at 85.60 mm wide, reprint.
- Measuring the wrong finger. Left and right differ, and so does every finger on the same hand. See left hand vs right hand.
- Sizing to a single reading. Take three, on different days if you can manage it.
- Ignoring the knuckle. If your knuckle is much wider than the base of your finger, neither reading alone is the answer. Read the big knuckles guide first.
When should you see a jeweller instead?
Home measurement is good enough for most purchases, and a calibrated measurement from a ring that already fits is genuinely competitive with a shop fitting.
Go in person when the ring is expensive and cannot be resized. Full eternity bands, tension settings and some carved or inlaid designs fall into that category, and so do tungsten and ceramic, which cannot be resized at all. When a mistake means remaking the ring rather than adjusting it, a quarter of a size of uncertainty is not good enough.
Go in person as well when the base and knuckle point to different candidate sizes and a matched sample does not resolve the fit. That is a fitting problem rather than a conversion problem, and a jeweller can assess whether beads, a spring insert or a hinged shank suits the design.
For other purchases, use a calibrated measurement from a ring that fits the exact target or a repeatable finger range as the chart baseline. Confirm the finished width and interior profile, and keep the seller’s exchange or resize terms with the order.