How to measure your pinky ring size without guessing from another finger
Measure the pinky on the hand where you will wear the ring. Use the inner diameter of a round ring that fits that pinky, or estimate its circumference and check passage over the knuckle. A US 7 ring finger does not determine your pinky size. Keep the original millimetres, then test a physical sample in the intended band’s width and profile.
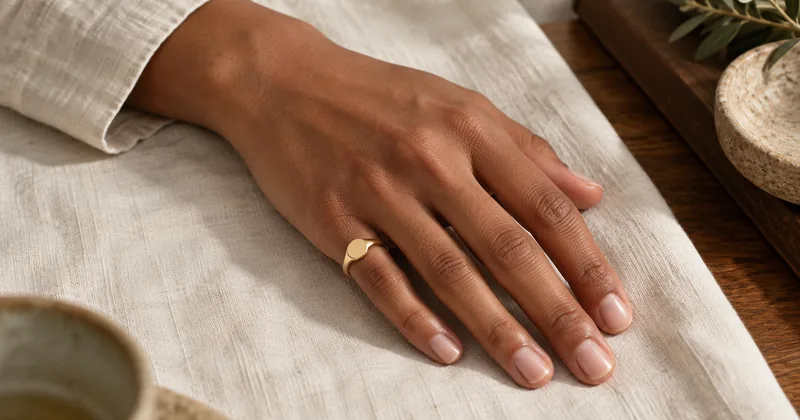
You may know your wedding-ring size and still have no useful number for a pinky ring. Subtracting one or two sizes is tempting, especially when a shop asks for a size before it lets you order. The trouble is that the difference between those fingers belongs to your hand; it is not a fixed relationship printed on a chart.
The pinky also has a fitting problem of its own. A ring must clear the joint, stay secure at the wearing position and avoid rubbing the ring finger beside it. A narrow plain band and a broad signet can behave differently even when their size labels match. The measurements below give you a starting point for that fit check.
If my ring finger is a 7, what size is my pinky?
There is no dependable conversion. The ring-finger number tells you about that finger and, if the record is complete, the hand and band that were measured. It does not describe the pinky’s base, joint or shape.
For example, a person’s US 7 ring-finger band might measure about 17.3 mm inside. That figure cannot establish whether a pinky opening should be 15.0, 15.7 or 16.5 mm. Those are different possibilities to measure, not options to choose by looking at a hand photograph.
The ring-size-by-finger guide covers all five fingers. For this purchase, label the target first: “left pinky” or “right pinky.” If you may switch hands, measure both and check the fit on each. A ring that works on both is a useful result; matching is not something to assume.
Start with a ring that fits the intended pinky
A suitable existing ring gives you a rigid opening to measure. Choose one worn comfortably on the correct pinky, rather than a ring that merely goes over its joint. Note whether it rotates or slides easily, and whether its width resembles the design you plan to buy.
Inspect the opening. It should be round, with a clear inner edge you can view from above. A bent band or a high setting that makes the ring tilt needs another method. GIA’s ring-measurement guidance specifies a round opening for inside measurements converted through a chart.
Measure across the empty opening from inner edge to inner edge, through the centre. Including the metal on either side produces an outside diameter, which is the wrong measurement for sizing. Repeat in a second direction. If the two readings disagree clearly, inspect the shape and angle instead of taking an average and calling the result precise.
The existing-ring guide explains calipers, rulers and screen comparison. When using a phone, check its physical scale first, then lift and replace the ring for each reading. Repeating one alignment without moving anything does not test whether you can reproduce it.
No pinky ring to measure? Use a finger estimate
A proper finger gauge or a jeweller’s fitting set is the best route when the purchase is important. A paper strip can help you prepare, provided you keep its limitations in view. It bends and can tighten into skin in a way that the finished ring will not.
Wrap a flat, non-stretch strip at the position where the ring will sit. Keep it level and mark the overlap without pulling it tight. Measure from the starting edge to the mark with a millimetre ruler. That length is a circumference. It is not a diameter and should not be entered into a converter as one.
Check the joint separately. A base measurement alone may suggest an opening that cannot pass the knuckle. Do not force a rigid sample across a resistant joint or keep testing if it hurts. If the joint is much wider than the base, take both measurements to a jeweller; a different fitting solution may be better than making the whole ring loose.
GIA’s home-sizing advice warns that paper and string can distort and miss joint clearance. Treat the strip as an estimate, then confirm it with a suitable physical sample. Our finger-measurement guide covers the complete strip workflow.
A worked example with two different pinky measurements
Suppose repeated measurements of fitting, round pinky rings give the following results. These numbers are illustrative, not measurements from a wearer or a prediction for your hand.
| Record | Inner diameter | Circular circumference | Nearest US row on this site’s chart |
|---|---|---|---|
| Left pinky, narrow reference ring | 15.3 mm | About 48.1 mm | 4.5 |
| Right pinky, narrow reference ring | 15.7 mm | About 49.3 mm | 5 |
Circumference is diameter multiplied by pi. For the first row, 15.3 × pi is approximately 48.1 mm. The difference between the rows is 0.4 mm of diameter, or about 1.3 mm of circumference. Averaging the two hands into one 15.5 mm record would lose the very information the comparison found.
These chart labels identify candidates. They do not decide how a new wide band will feel, or prove that every retailer’s US 4.5 has exactly the same opening. Preserve the measured values and use the ring-size converter with the input clearly marked as diameter or circumference. Ask the seller which adjacent samples match its finished design.
Check security without making the ring tight
Try the appropriate physical sample with the hand relaxed. Let the fingers point down over a soft surface and move them normally. The sample should remain in place, while still coming off with a controlled, comfortable movement. Catching a ring over a towel is preferable to discovering a loose fit over a sink.
Then bend and straighten your fingers. Check whether the band presses into the web beside the ring finger, catches on that finger or moves toward the tip. A large decorative face may turn because of the design’s balance. Reducing the opening until rotation stops can leave the joint too tight; ask the jeweller about the fit and construction together.
Repeat the fitting under ordinary conditions on another day. A result taken with unusually cold, hot or swollen hands is a poor basis for a permanent order. The best-time-to-measure guide helps you compare readings without turning the time of day into an automatic size adjustment.
Width and signet-ring shape need their own test
A small finger leaves less room for a ring’s shoulders and edges. Check the outer width as well as the hole: a correctly sized opening can still sit awkwardly beside the next finger. Hold a phone, close your hand gently and notice whether the design interferes with those movements.
Use a sample close to the finished ring’s width and interior profile. A thin sizing loop cannot fully reproduce a broad, flat band. There is no universal half-size addition for width, nor a standard subtraction for a rounded interior. The wide-band guide explains what to compare instead.
For a heavy signet, see the signet sizing guide for shoulder, rotation and setting checks. This article’s job is to establish the pinky’s measurement. The finished design still needs to be tried against it.
What if your pinky is below the site’s chart range?
This site’s reference chart begins at US 3. Some pinky measurements will sit below that range. That is a chart limit, not proof that you measured incorrectly or a reason to order the smallest available row.
Repeat the physical reading and contact the retailer with the millimetres. Ask which smaller sizes it makes and whether a fitting sample is available. If an app or converter reports that an input is outside its supported range, retain that input and use the maker’s chart. Do not keep changing the number until the tool accepts it.
Before you order
Save the hand and finger, original units, measurement method, date, reference width and fit observations. A useful note reads: “Left pinky; about 15.3 mm inner diameter from a narrow round ring; home estimate; clears the joint and stays secure.” Replace those details with your own.
Send the seller that measurement along with the intended design. Confirm its sizing system, exchange terms and whether the ring can be resized. For a non-resizable or custom ring, use the maker’s fitting sample before committing. A well-kept number helps the conversation; the sample tells you whether the ring belongs on that pinky.